20/10/2021
Locost: IVA Test and Finish Line
Overview: This is a very important article to me. Getting the car on the road was a huge life goal, and it's nice to have kept the story up on the web. I don't get much time to play with cars these days (that's being a dad for you!), but just having it there in the garage as a trophy is still pretty cool - 16/11/2024
Its been about six months since I last posted, and as always I have been squirrelling away. My last article, posted back in May, covered the airfield testing of the car and the uncovering of a few gremlins. Lets start there.
Post-Airfield Fixes
Remember I said the engine was smoking on over-run and I was pretty sure it was the valve guides? Well I’m not always right about these things.
I wasn’t confident I could get the valve guides replaced in a short period of time so I decided to strip the cylinder head off one of my spare engines, given that’s what they are there for, and check the valve guides. If they were good and within tolerance I would give the head a quick rebuild and swap it with the one in the car.
The donor engine was out of my old daily Swift Gti and as such I knew it was in “okay” condition. It had started running a bit weird before it was pulled out of the car, but years later I would diagnosed it as either a faulty fuel pump or a jammed up fuel filter. It had started to lose power over 3500rpm and the plugs showed all the signs of being a bit lean, but generally healthy. This engine had sat in storage for about five years but actually looked pretty good on the inside. Just a bit carbon’y.
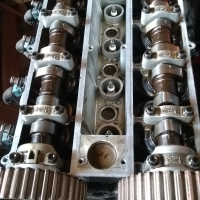
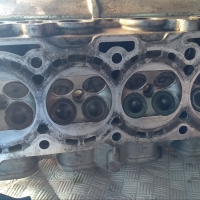
Replacement cylinder head. Dirty on the outside, clean on the inside; perfect.
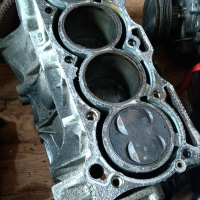
Under the carbon build up this engine was as clean as you like.
That is a tea spoon of oil in each bore. Nice.
I leak tested the chambers, which were fine, and stripped apart the cylinder head . Suzuki gave a tolerance in the workshop manual for the valve guides and I had a drill-bit that was exactly the low end of their tolerance. If the drill shank fit within the guides and was tight, then they were good. Every single one of the 16 guides was a tight fit; which was fantastic.
I gave the cylinder head a good clean, re-seated the valves with course and fine cutting paste, and replaced all of the stem seals. At this point it was ready to go into the car. So I pulled the old cylinder head off the engine in the car and…
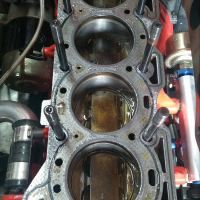
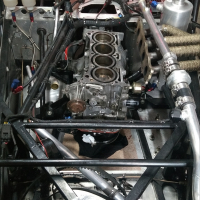
Well the picture above shows you the horror. A tea spoon oil in each cylinder. No wonder the plugs were wet! This certainly accounted for the smoke I had been seeing and meant my fix would need to be a lot more drastic. This was a huge gut punch given the amount of work I had put into rebuilding the engine, but I was done messing around and if I was going to drive the car on the road before the end of year the engine would have to get replaced.
Over a number of weekends I cleaned the donor engine and swapped over all of the important parts. The ARP head studs, dry sump system, uprated clutch etc. The old short block was out and the replacement cleaned-up version was in the car after three afternoons; I was pretty happy with this.
Cleaned up cylinder head
Replacement short block in place
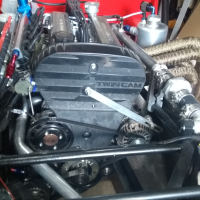
Cylinder head all bolted down
With the new engine in and running it was a night and day change. A completely clean exhaust, even during warmup, and lovely clean plugs. For the first time since before 2018 I had a happy running car. This was a huge step forward and I knew that IVA was going to be possible!
Up and running!
We had a leaky clutch slave, leaky fuel tank filler, damaged rear cover and broken wheel arch bracket after airfield testing, and all of these were amended before August 2021, at which point I put the car away to sleep for a while as I was about to get married!
Pre-IVA Work
After my wedding and honeymoon I put the paperwork in for the cars IVA test (Individual Vehicle Approval) and got to my very last concerns.
My wife asked me what the car might fail on so I could prioritise and focus on a first pass. The first thing that came to mind was noise. Back in 2017 at Snetterton the car managed 100dB at 5000rpm which was 1dB over the legal limit for IVA (99dB). I wanted to make sure the car breezed through the noise test with no issues so I decided to perform my own, as well as rebuild the exhaust back box.
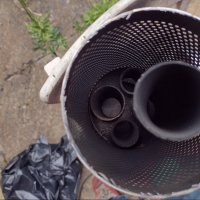
The back box was some unknown carbon fibre unit I bought off of ebay many moons ago. I knew it was a from a Yamaha sports bike and appeared to be rebuildable but that was about it. I tried to remove the carbon fibre outer body and weirdly enough there was some 3mm thick aluminium underneath it! So the carbon fibre was just for looks; not my kind of thing.
So, not carbon fibre than?
It had maybe 5mm of very burnt old padding inside it
Err.. no thankyou
I had to cut and peel the outer shell off to get at the internals and by this point I had already committed to completely rebuilding the whole box. Inside appeared to be a small gap for fibreglass padding, 5mm-ish all the way around, and then a series of weirdly routed baffles. The outlet didn’t even fully align with the internal piping which was quite disappointing.
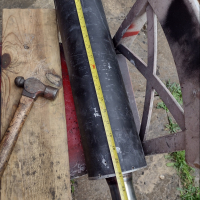
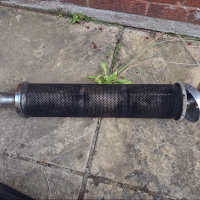
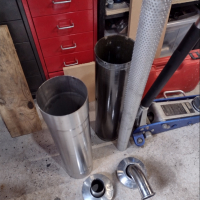
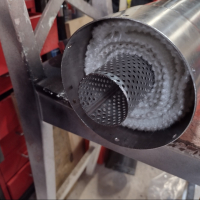
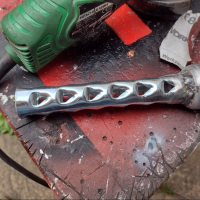
I jumped on the internet and ordered a 5inch diameter piece of stainless exhaust tube, which is flared both ends to allow the old end caps to be used. I also ordered some 2inch diameter perforated stainless tube to run down the middle of the box. This was wrapped with 1.5meters of Acousta-fil exhaust material.
After a bit of welding, drilling and riveting I had a fully rebuilt back-box.
Pretty much a build your own back-box kit
Much better
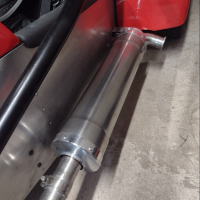
Fully modified and back on the car
Using the noise meter from work we could do our own mock noise test. With the new back box installed the car managed a whisper quiet 105dB! Oops. I knew the Acousta-fil needed some time to expand and do its job, but either way I had made the exhaust noise worse. That said, it sounded fantastic 🙂
How did I resolve the noise issue? I went the tried and tested route and installed a dB Killer. Not my proudest moment but they really do work. Having modified and installed this in the back-box inlet we managed 95db at 5500rpm, a full 10db reduction! That is huge. Its great to have the option to make the car more friendly if needs be.
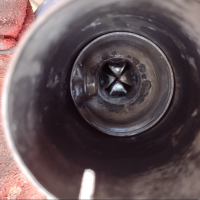
A dB Killer baffle, with the internals switched around
Installed. I am happy that baffling is in the correct direction
Other than the odd bit of trim here and there, that was it, the car was ready for IVA.
IVA Test
Early Start and Arrival
To get to the test centre with time to spare I reckoned I needed to leave at 5am in the morning. You have to be there by 8am, with the car unloaded and ready to go, and it was an hour and half drive away from me. I understand that my maths doesn’t entirely make sense, but there was absolutely no way I was going to be late! Subsequently the traffic was amazing and I ended up sitting in the services next door beforehand, but it never hurts to be prepared!
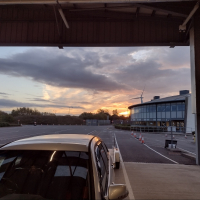
Needless to say I got to Bristol test centre with plenty of time to spare. Although it was cold and autumnal it was quite a beautiful day, and very quiet down on the docklands.
A beautiful sky over Bristol at 7:30am
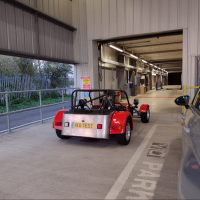
Waiting to be probed and proded
Weigh bridge
After introductions and a quick look over of the car it was straight onto the weigh bridge. The car came in at 540kg (245kg+295kg) with a full tank of fuel. This was a little disappointing as this was the heaviest I had ever seen it on the scales, although maybe this is simply the real road going weight?
It was weighed many years back in racing trim at 475kg; completely dry. Since then it has gained two full size seats with padding, a properly working water system with header and spill tank, a dry sump system with a 5 litre oil tank, a full full size fuel tank, mirrors, IVA trim, padded interior, lights, full size arches etc etc. So 540kg sounds about right! That’s the price you pay to have a proper road going car with a roll cage; I’m not going to complain.
For comparison a Mk1 MX5 weights 960kg and a Mk3 weighs 1122kg…
General build standards
The two testers had a good poke around the car before going much further just to make sure there weren’t any glaring failures or safety issues right off the bat. So far so good. They were very complimentary on the construction and there was definitely a good vibe. I felt I had presented a clean car.
While the car was on the trailer the day before I had taken the fuel cap assembly out and loctited the bolts, but I had forgotten to reattach the fuel filler cap tether! They were very forgiving and let me use my spanners to fix that issue right there and then.
Emissions
Not much to say, the 30 year old 100k+ engine flew threw with almost comically good emissions. I am glad I swapped it out!
Exterior and Interior Radii
This was the one thing that worried me the most. The radii rules are absolutely brutal. The car is tested with a fake 100mm “knee” and anything that contacts it, which is less than 5mm above a surface, must be radiused to 2.5mm. Fortunately all of my hard work, rubber trim and 3d prints really paid off! It flew through on both Exterior and Interior Radii.
There were a few questions over components I had used and we discussed what constituted a pass or a failure. It was pretty informative.
Underbody construction and alignment
After that the car went up on a hoist and was checked from underneath. It was quite cool to have someone different actually look at all the work under there. Very few, if any, people have looked at the car from that angle.
Again, they were very complimentary on the quality of the build.
Light Alignment
I had setup the light alignment using the numbers in the IVA manual and sticky tape on my garage door. My drive is not flat. That said, one of the lights was bang on and the other required a minor adjustment to pass. I was happy with that.
The equipment they use at the test centre actually shows the light pattern on the same piece of paper displayed in the IVA manual. Its pretty impressive.
Brakes and Brake Dyno
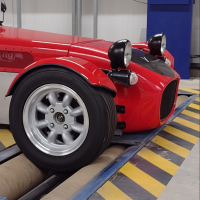
This was the first of two rolling roads that the car would go on during the day. The front and rear axles were tested separately, measuring the peak longitudinal loads they could achieve before locking, and the relevant pedal effort required to achieve those loads. This was also done at a number of increasing pedal loads to give the characteristic of the braking axles. Again, all very impressive and fun to watch.
On the rollers for the brake test
Speedo Calibration
Given you have probably already read my article covering airfield testing you know all about my method of calibrating the speedo. Guess what? It bloody worked. The car flew through the speedo test.
This is actually a really cool test as the car is put on a rolling dyno and run up to 70mph. The tester waded through the gears and the car sound great as usually. I was darn proud at this point.
Noise
Next up was the noise test. Given the dB Killer and measurements I had done beforehand I was pretty comfortable it would pass the test. It easily flew under the radar at 93ish dB. No worries there then!
One issue that did raise its ugly head is hot starts of the engine. I have been playing with the settings in Megasquirt to reduce the amount of start-up fuel put into the engine when the engine is warm but I think the firmware has a bug in it, and the temperature sensitivity doesn’t work. So it bellowed black smoke on restart for about five seconds before doing the test. Great.
Mirrors
Not much to comment on. It flew through.
Dynamic Brake Test
I have no idea what went on during this test, but it sounded like the tester was enjoying himself. The intake noise was glorious.
Debrief
And that was that. Almost three years of hard work to take my little red race car from track toy to road legal car. I can’t say it didn’t have its ups and downs, especially with COVID hassling me and having a somewhat broken engine, but I am really happy with the end result.
The Locost is a weird thing. I have put so many hours into it that it kind of scares the crap out of me even when its stood still. A new phase of our relationship has begun which will hopefully be a little bit more give/take!
The final picture says it all really.
Pass! One very tired owner and one very happy car
Bonus Round: First Drive
It has taken me some time to write this article as life as been relatively busy.
All in all it took about four weeks from the IVA test to receiving my registration number. Considering the amount of flak the DVLA get they actually seemed to do everything in their power to get my registration turned around and they were really helpful on the phone.
I received my Q plate on a Friday afternoon and I had it insured and number plates the same day. This led to me to waking up at 6:30am on the Saturday like a giddy child for my first ever drive on the road….
The early hours
What can I say? Its awesome. All of the performance numbers and pub chat aside, driving one of these cars is an experience. I imagine its much closer to riding a motorbike than it is to driving a modern hatchback. Its interactive, you feel everything. Not only that you feel like you are going warp speed when you are cruising along at 60mph. The exhaust note, the direct steering, the throttle response. Its unique.
There are certainly quicker cars. There are certainly “better” cars. But there are none like mine.
Designed by me


